
Table of contents
- How I Batch Create a Week of Instagram Content
- Quick Comparison
- How to Plan a Batch Filming Day Before You Hit Record
- What Makes a Reel Easy to Batch Film
- 1. Quick Tip Reel
- 2. Product Demo Reel
- 3. Behind-the-Scenes Process Reel
- 4. Myth vs. Fact Reel
- 5. Before-and-After Transformation Reel
- 6. Common Question Answer Reel
- 7. Mistake and Better Alternative Reel
- 8. Trend Adaptation Reel
- 9. Screen-Recording Tutorial Reel
- 10. Reaction or Quick Breakdown Reel
- Batch-Filming Workflow to Turn the 10 Ideas Into a Content Queue
- Conclusion: Keep Your Reel Ideas Simple, Repeatable, and Ready to Publish
- FAQs

You can film a week of Reels in one 2-hour session if you keep each video short, use one setup at a time, and stick to one simple flow: hook, point, CTA. The article breaks down 10 Reel formats that are easy to batch, plus a basic workflow for planning, filming, editing, and scheduling them.
Here’s the short version:
- I can batch 4–6 finished Reels in one focused session.
- The best Reels for batch days are usually 15–30 seconds long.
- The first 1–3 seconds matter most for stopping the scroll.
- A simple script works best: one problem, one point, one CTA.
- I should group ideas by setup: talking head, product shots, BTS, and screen recordings.
- It also helps to leave 1–2 open slots for trend-based Reels. You can find current Reels trends to fill these spots quickly.
The article covers these 10 ideas:
- Quick Tip Reel
- Product Demo Reel
- Behind-the-Scenes Process Reel
- Myth vs. Fact Reel
- Before-and-After Transformation Reel
- Common Question Answer Reel
- Mistake and Better Alternative Reel
- Trend Adaptation Reel
- Screen-Recording Tutorial Reel
- Reaction or Quick Breakdown Reel
How I Batch Create a Week of Instagram Content
sbb-itb-3c55afb
Quick Comparison
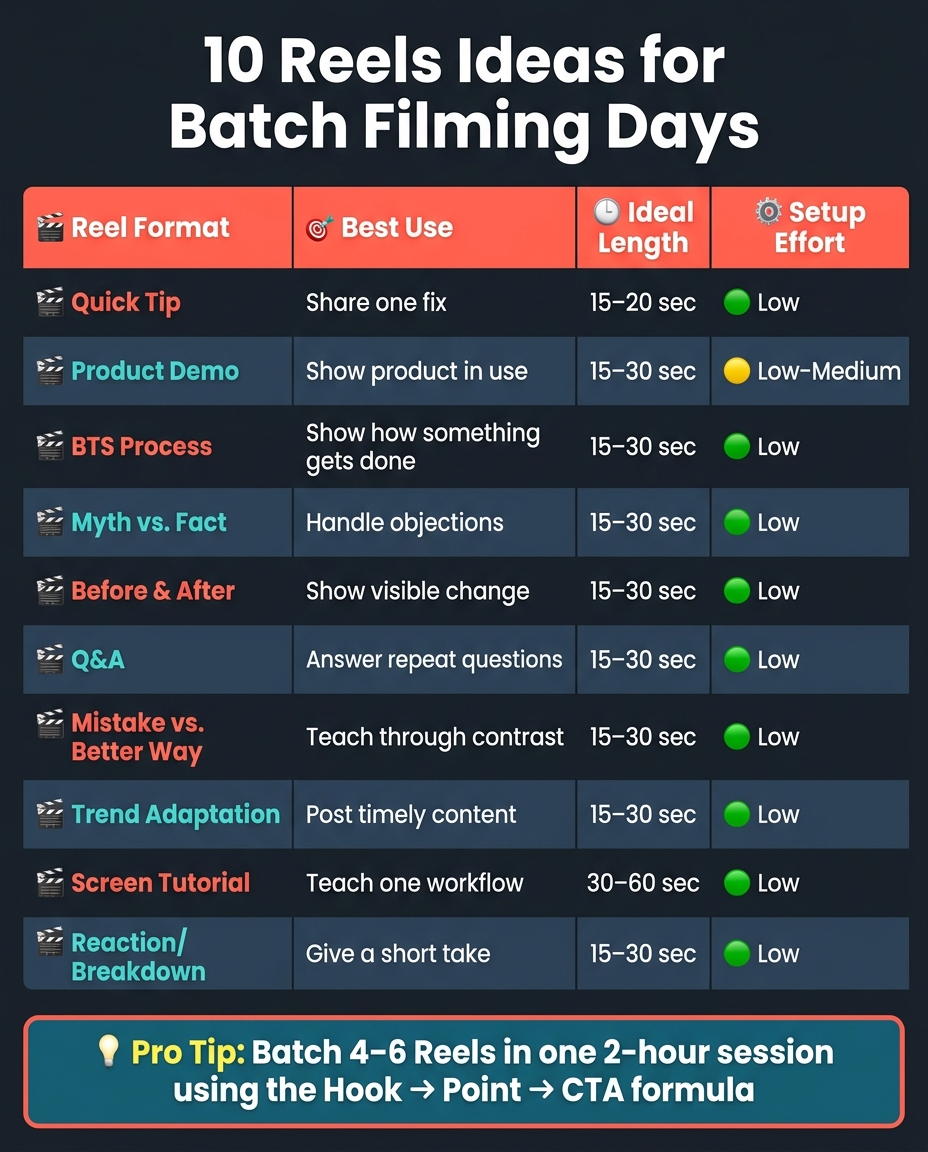
10 Reels Ideas for Batch Filming: Quick Comparison Guide
| Reel idea | Best use | Usual length | Setup effort |
|---|---|---|---|
| Quick Tip | Share one fix | 15–20 sec | Low |
| Product Demo | Show product in use | 15–30 sec | Low to medium |
| BTS Process | Show how something gets done | 15–30 sec | Low |
| Myth vs. Fact | Handle objections | 15–30 sec | Low |
| Before-and-After | Show visible change | 15–30 sec | Low |
| Q&A | Answer repeat questions | 15–30 sec | Low |
| Mistake vs. Better Way | Teach through contrast | 15–30 sec | Low |
| Trend Adaptation | Post timely content | 15–30 sec | Low |
| Screen Tutorial | Teach one workflow | 30–60 sec | Low |
| Reaction/Breakdown | Give a short take | 15–30 sec | Low |
Bottom line: if I want batch filming to work, I need short-form video content scripts, few resets, and one clear action at the end of each Reel.
How to Plan a Batch Filming Day Before You Hit Record
Map out your 10 Reel ideas before you open the camera. Start with the CTA, then write a one-line hook for each Reel. If you can't explain the CTA in a single sentence, that Reel isn't ready yet.
Next, sort your ideas by setup. Put all your talking-head clips together, then your product demos, then your screen recordings. Film each type back-to-back so you're not stopping every few minutes to reset lights, props, or framing.
Once your setup is dialed in, grab reusable B-roll too. That can include close-up texture shots, routine clips, and other footage you can drop into future Reels. Using the same session this way saves time later and makes it easier to sort the 10 ideas by filming difficulty.
It also helps to leave 1–2 open slots for trend-based Reels. That gives you room to post them while they're still timely. Trending audio and POV-style formats often need a quick turnaround to stay relevant. Use that queue to knock out the easiest formats first.
What Makes a Reel Easy to Batch Film
The easiest Reels to batch have three things in common: a repeatable structure, very few setup changes, and short scripts.
Here’s the simple version: use the same format every time - hook, one point, CTA. A smart way to write these is to start with the CTA, then work backward to the hook. That keeps the script tight and makes filming a lot less messy.
When you’re choosing ideas, go for the ones that fit that pattern with the least effort.
A good rule of thumb is one point per Reel. One tip. One small problem. One clear takeaway. Once a Reel starts trying to cover too much, it gets tougher to script and tougher to say in a natural way on camera.
Short Reels, usually in the 15–30 second range, tend to get the best mix of completion rate and engagement to help create viral Reels.
Another easy win: film two hook versions for the same Reel. Record the same tip twice - once with a bold claim, and once with a direct payoff. Now you’ve turned one setup into two separate assets.
That same approach works well for:
- Product demos
- Screen-recording tutorials
If you want the fastest turnaround, batch these formats first.
1. Quick Tip Reel
One Problem, One Fix
Start with the fastest Reel format to shoot: quick tip Reels. They’re simple to batch because the structure is tight: one problem, one fix, one CTA. Pick one small problem your audience has and solve it in under 20 seconds.
Lead with the problem or a bold claim. Then give the fix. Wrap up with one clear CTA, like "DM us the word TIPS." If you want early wins on shoot day, this is a smart place to start.
This format works so well for batch filming because it asks for almost no setup. You can stay in one location, wear one outfit, and film a bunch of Reels back-to-back without resetting your space. That cuts friction and keeps the pace up.
A lot of people watch with the sound off, so keep on-screen text and proven Instagram caption ideas running through the clip. That way, the point still lands either way. It also helps to use the same framing for every tip Reel, which makes each take faster to film.
Keep the CTA to one action. For example: "DM us TIPS." If your CTA needs more than one sentence, the Reel probably doesn’t have a clear focus yet. The same one-problem setup also works well for question-based Reels.
2. Product Demo Reel
Show the Product Solving the Problem
Product demos follow the same hook-point-CTA flow, but here the product does the heavy lifting. This format is one of several Instagram ecommerce tips that can help convert viewers into customers. Start with the problem or the before state, show the product in action, and end with the result plus one clear CTA, such as "Link in bio for pricing". Pick that CTA before you write the hook so the Reel has a clear goal from the start. That’s one reason demos are one of the fastest formats to batch once your setup is set.
Keep demos short so the product action stays easy to follow.
On shoot day, film all stationary product shots and in-use clips back-to-back in one block before you change the setup. Group close-up detail shots and in-use clips together, then add on-screen text or a voiceover to explain the benefit. Use on-screen labels to point out the feature, step, or result. That helps the message land even when people watch with the sound off.
One product setup can give you several Reels from the same angles:
- Wide shot
- Close-up
- In-use clip
That keeps resets low and output high.
3. Behind-the-Scenes Process Reel
Show the process, not just the result
Once you've filmed product demos, shift to the work behind the product by learning how to make Reels that showcase your process. A behind-the-scenes (BTS) Reel fits batch days well because it shows a clear process you can repeat, film from one fixed angle, and shoot in a single spot.
One easy option is a fulfillment process, like packing an order. It follows a straight path, looks good on camera, and is simple to film in one take.
Stick to the most visual moments:
- Open the box
- Pack the item
- Seal it
- Add the label
Use the same camera angle for each step so you don't have to reset much. Add on-screen text so people can follow along with the sound off. Then finish with one CTA, like "DM us for the checklist."
Best BTS format to batch:
- Fulfillment process Reel - Set a fixed angle and film one order from open box to sealed package.
4. Myth vs. Fact Reel
Correct one wrong belief your audience holds
After behind-the-scenes clips, move into myth/fact Reels. They’re a fast way to handle common objections and clear up confusion. They are also a powerful tool to get more followers on Instagram organically by building trust. They also work well for batch filming because the format is repeatable. You can write several myth/fact pairs in one sitting, then film them back-to-back with the same framing and the same script pattern.
Lead with the myth in the first 1–3 seconds so people stop scrolling right away. Keep each Reel short, around 15–30 seconds. Add on-screen text that clearly marks the "Myth" and the "Fact" so the point still comes across with the sound off. End with one CTA, such as "DM us the word TIPS for the full checklist."
Best myth/fact format to batch:
- Common misconception Reel - Choose one myth your audience hears all the time, pair it with a clear fact-based payoff, and film several versions in one session using the same setup.
5. Before-and-After Transformation Reel
Show the change, not just the end result
Before-and-after Reels are a strong fit for batch filming because the format stays the same each time. You just switch the subject.
A cleaned workspace, a finished project, or a product in use all give you a clear visual shift that's easy to film in bulk. And because both versions can usually be shot in one setup, the process stays simple.
Use the change itself as the hook. Start with the after shot, then reveal the before. Add on-screen text throughout so the transformation is easy to follow even with the sound off. End with one CTA, picked before filming.
Best before-and-after format to batch:
- Simple transformation Reel - Show one visible change in the same setup, from before to after.
That one-change structure also makes future formats easier to script.
6. Common Question Answer Reel
Answer one real question, fast
Next, turn repeat audience questions into fast-answer Reels. Pull them straight from your DMs or comments. When the same question shows up again and again, that’s a clear sign your audience wants an answer. It also gives you ready-made batch assets you can script, film, and reuse in one session.
Keep each Reel centered on one specific question. Aim for a 15- to 30-second answer. Add on-screen text so people can follow along without sound. Write the CTA first, like "DM us TIPS" or "Link in bio for pricing." or other ways to drive traffic from Instagram. If your CTA takes more than one sentence, trim it down.
Batching format: use one setup for several repeat questions.
- Quick Answer Reel - Pick one real customer question, answer it in under 30 seconds, add text overlays, and end with a single CTA. Film several answers in the same setup.
7. Mistake and Better Alternative Reel
Show the wrong way, then fix it fast
Once you've answered common questions, the next easy move is to turn repeat mistakes into short fixes. The format is simple: show one mistake people know right away, then show the better move. It works well because the structure doesn't change, which means you can film a bunch of versions in one sitting.
Go with mistakes your audience can spot in seconds. And skip the generic intro. A specific, outcome-driven hook does a much better job of stopping the scroll.
Batching format: use a mistake-then-fix structure. Show the mistake, then cut to the fix. Keep the Reel short. Film all mistake clips first, then all fix clips, using one setup.
- Mistake vs. Better Alternative Reel - Open with one common mistake, show the fix, and end with one CTA. Use text overlays throughout.
If you still have time left in your batch, use it for trend-based versions.
8. Trend Adaptation Reel
Use trends without copying them
If you’ve got one slot left in your batch, use it for a trend adaptation Reel. The idea is simple: take trending audio and pair it with Instagram content ideas that fit your niche, instead of copying the trend word for word.
The easiest batch-friendly version is a POV Reel. Put the viewer inside a situation your offer helps fix. It feels current, but it still points back to your business. Before you film, check Instagram’s audio search. Then add the audio during editing.
For batching, keep it simple. Film all your POV clips in one location, with one outfit, and one setup. Match each scenario to one sound and one CTA. That means one trend-ready setup can give you several POV versions without a bunch of resets.
Use this format when you want a fast, low-reset Reel that still feels current.
- POV Trend Reel - Open with a recognizable scenario, use trending audio, and end with one CTA.
9. Screen-Recording Tutorial Reel
Teach one specific workflow
If your content revolves around an app or software, screen recordings are one of the fastest formats to batch. One screen capture can turn into several short tutorials without much editing, which makes this format easy to repeat. The key is to keep each Reel centered on one workflow only.
Aim for 30 to 60 seconds per tutorial. That window tends to work well for educational content people want to save and come back to later. Start by showing the result right away, then add captions and walk through just one task from start to finish. A lot of people watch with the sound off, so on-screen text matters. Each step should still make sense even if the viewer never hears a word.
When you batch this format, record a few screen captures in one sitting and edit them all at once. It saves time and keeps the style consistent. Wrap up each Reel with one clear CTA, like "DM us the word TIPS for the full checklist."
Use this format for any repeatable workflow your audience wants to see step by step.
- Workflow Walkthrough - A screen-recorded Reel showing one high-value workflow or hack inside a digital tool or app your audience already uses, with captions only.
10. Reaction or Quick Breakdown Reel
Share a quick take on something your audience already cares about
If you still have one slot left in your batch, use it for a reaction Reel. This format works well for fast, low-edit Reels that add your take to something your audience already watched, like an unboxing or a first-use moment. It’s a smart pick when you already have a product clip, comment, or moment worth replying to.
Keep the Reel between 15 and 30 seconds. Start with the payoff, the problem, or a bold claim right away. Don’t make people wait for the point. Add on-screen text from start to finish so people watching on mute can still follow along.
When you batch this format, write 4 to 6 short scripts based on saved comments or recent product moments before you film. Then, once they’re recorded, drop them into your content queue.
- Reaction or Quick Breakdown - A 15-to-30-second Reel that responds to an unboxing or a first-use experience, using on-screen text and one CTA.
Batch-Filming Workflow to Turn the 10 Ideas Into a Content Queue
Before you hit record, choose six ideas from the list and sort them into three themes. That gives your filming block a clear aim and helps you avoid making up each Reel on the fly. From there, group the ideas by setup so production moves faster.
Once your scripts are ready, film by setup instead of by idea. Start with product shots, then record talking-head clips, then move into in-use shots. Stick with one background and one outfit so the batch looks consistent from start to finish. In a two-hour filming block, this setup can produce a week of Reels.
Rename every file right after you film it. A simple system like QuickTip_Sep. 30, 2026 or ProductDemo_Oct. 7, 2026 makes clips much easier to find later. When it's time to edit, do the whole batch in one sitting. Edit everything in one 45- to 90-minute block, and use the same caption style and transition style across the batch. Canva templates or your phone's native editor can help keep the look uniform without piling on extra edits.
After that, schedule the batch based on shelf life. Post trend Reels first and save evergreen Reels for later. Tutorials, tips, and myth-busting Reels can go further out in the queue. Load everything into your Instagram scheduler in one sitting, and your content calendar is set before the week even starts.
Conclusion: Keep Your Reel Ideas Simple, Repeatable, and Ready to Publish
These 10 formats give you a repeatable library for batch filming. Tips, demos, behind-the-scenes clips, myths, transformations, questions, mistakes, trends, tutorials, and reactions can all be used again and again from one batch session to the next. That makes it easier to plug them into your main content pillars without starting from scratch each time.
One batch session can stock your Instagram content queue for the week. That's the whole idea behind batching: less setup, more output.
Start with evergreen posts, then mix in one or two trend Reels to stay current. The first 1 to 3 seconds of a Reel are critical for stopping the scroll, so keep your hooks sharp and your formats simple.
FAQs
How do I choose the best Reel format for my niche?
Match the Reel format to your goal and what your audience needs at that moment. Use a product showcase or unboxing when you want more awareness. Go with how-to, voiceover, or testimonials when the goal is trust. And if you want action, lean on demos, problem-solution, or transformation content.
The first 1–3 seconds need to do the heavy lifting. That’s where the hook has to hit. Then keep your message focused and end with one clear CTA in the last 3–5 seconds.
When you test, don’t change everything at once. Test 3–5 hook variations while keeping the rest of the Reel the same. That way, you can tell what’s working instead of guessing.
What should I do if I only have 30 minutes to batch film?
If you only have 30 minutes to batch film, keep the setup simple and easy to repeat. Choose one goal, write three to six short scripts, and stick to one location and one outfit so you don't burn time on resets.
Put your energy into quick, high-impact Reels, like product demos or short tips. Aim for clips that run 7 to 15 seconds. And if you need ideas fast, UpGrow’s viral content library can help you find trending topics without a long search.
How often should I mix trend Reels with evergreen Reels?
Rotate through your content pillars each week instead of jumping on every trend. Put most of your effort into evergreen educational and inspirational posts, then use trending audio or popular formats to help more people see them.
A simple way to do this is to shape each week around three core content pillars. That keeps your feed consistent and easy to recognize. UpGrow’s live dashboard can show you which Reel types lead to the most follows and profile visits.


